When working with Linux VMs in Azure, there can be a few situations where your VM is not accessible. Say, for instance, you receive an OS provisioning timeout error. This is just one example, but in this situation you typically would want to look at some form of logging on the VM. In these types of issues, though, you will be unable to access the VM through normal means (e.g. SSH).
This blog post will show you how you can still access the OS disk on the failed and inaccessible Linux VM.
Remediation overview
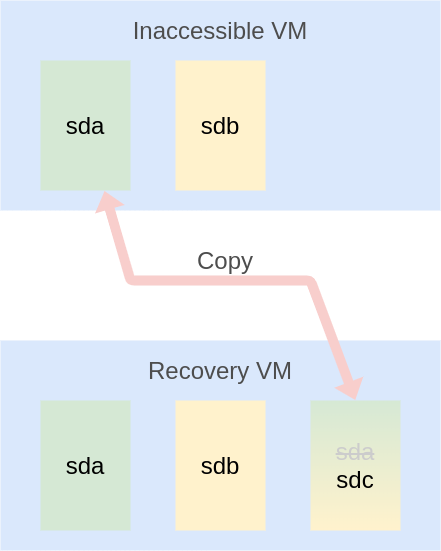
To access the OS disk on an inaccessible Azure Linux VM, follow these logic steps (commands and details below):
- Create a new Azure Linux VM (this will be referred to as the recovery VM).
- Retrieve the OS disk ID from the inaccessible VM.
- Copy the OS disk from the inaccessible VM to a new disk.
- Attach the copied OS disk to the recovery VM.
- Mount this disk in the recovery VM.
Here is an illustration shows these steps in a simple format:
This approach has a couple of benefits. Primarily it allows us to leave the inaccessible VM intact. Unlike data disks, we are unable to detach an OS disk from an existing VM. The only possibilities moving forward would be to:
- Delete the inaccessible VM and attach the original disk to the recovery VM. Or…
- Create a copy of the inaccessible VM’s OS disk and attach that to the recovery VM.
The second approach is better because:
- It leaves the original VM “there” in case any other discovery or remediation needs to happen.
- It’s faster to copy a disk and attach that copy than it is to delete a VM and attach the original disk.
Details and commands
Below are the specific commands you should focus on to replicate the workflow overview.
Create the recovery VM
This is a basic az vm create to deploy a new Linux VM.
Retrieve inaccessible VM’s OS disk ID
To be able to create a copy of the disk, we need to get the ID of the original.
1
2
3
4
5
6
7
TARGET_DISK_ID=$(az vm show \
    --resource-group "$RECOVERY_NAME" \
    --name "$RECOVERY_NAME" \
    --query "storageProfile.osDisk.managedDisk.id" -o tsv)
TARGET_DISK_NAME=$(az disk show \
    --ids "$TARGET_DISK_ID" \
    --query "name" -o tsv)
You can take the original disk name and just append copy on it:
1
DISK_COPY_NAME="${TARGET_DISK_NAME}copy"
Copy the inaccessible VM’s OS disk
The way to create the copy is to run az disk create but specifying --source to point to the original disk.
1
2
3
4
az disk create \
    --resource-group "<resource_group>" \
    --name "$DISK_COPY_NAME" \
    --source "$TARGET_DISK_ID"
Attach the disk to the recovery VM
1
2
3
4
5
az vm disk attach \
    --resource-group "<resource_group>" \
    --vm-name "<recovery_vm>" \
    --lun 0 \
    --name "$DISK_COPY_NAME"
Mount the disk in the recovery VM
At this point, the block device sdc should now be available to the recovery VM, so we just need to mount it:
1
2
ssh <recovery_vm> "sudo mkdir /mnt/vm_recovery_os_disk"
ssh <recovery_vm> "sudo mount /dev/sdc1 /mnt/vm_recovery_os_disk"
Now the OS disk of the failure is mounted in /mnt/vm_recovery_os_disk and you can browse the disk’s contents from within the recovery VM!
Process reusability
One of the ways I approach the CLI is to have reusability for helper functions.
I don’t suggest that you use my az-cli-helpers, as they are very specific to my work. But if you want to see how I’ve implemented this scripted process to mount a failed OS disk, you can find it in the GitHub repo.
Summary
If you run into a situation where your Azure Linux VM is inaccessible, but you want to browse the OS disk to look at logs you can follow the above process! Hopefully this gives some confidence on troubleshooting Azure Linux VMs in this situation. Thanks to my colleague Anh Vo (LinkedIn, GitHub) for the idea to do this!